Introduction
This one time, I went on a quick painting spree, where I would just paint whatever flower popped up in front of me. It just so happened that the very first flowers that I came across during that period was this beautiful vase of hollyhocks. Now, I felt a bit puzzled. On one hand, I really wanted to paint the most gorgeous bunch of hollyhocks anyone has ever seen, and on the other hand, I had to deal with the fact that I didn’t really know how I could paint them properly. So, I did what I do best, took a stroll across the internet, and began studying video tutorials on how to pain hollyhocks.
To paint hollyhocks, you need to maintain two things. The first is the structure itself. If necessary, draw the outline of the flower with a pencil, and then begin coloring. The second thing you need to do is use proper shades. Without accurate color shading, the painting will look a little less professional, and maybe even incomplete.
Step by Step Hollyhock Painting Tutorial

In this video tutorial, the artist will provide you with a comprehensive, and step by step lesson on painting hollyhocks. The coloring, although not perfect, is quite neatly done. This painting would’ve been a 5 out of 5 if only it had a bit more details. This lack of accurate coloring and details makes this artwork quite easy to work on, and hence, it’s perfect for beginners.
Things You'll Need:
Simple Hollyhock Field Painting

This field of hollyhock is quite roughly painted. It lack depth, and proper shading. It’s a beginner’s level tutorial, and so we can ignore these issues. But even if you’re a beginner, you should know what you’re doing, and what could’ve been done. If you want, you could even add some details on your own, and see if the painting can be improved that way.
Things You'll Need:
Realistic Hollyhock Painting

This video tutorial will show you how to paint a realistic hollyhock field using oils. The details, as well as the vivid coloring, makes this painting look realistic. If you're experienced as an artist, this is something you'll love to work on. Beginners too are can try this piece. They might not be able to replicate it perfectly, but they can surely expect to learn a lot.
Things You'll Need:
Hollyhock Painting for Beginners

In this video tutorial, the artist will provide you with a simple painting lesson on how to create hollyhocks using acrylics. There’s nothing complex about this painting. It’s quite simple, and mostly involves straightforward painting techniques. The painting is a bit rough though, and could’ve done a bit more in terms of the shades.
Things You'll Need:
Charming Hollyhock Painting in Watercolor

This video tutorial will show you how to paint hollyhocks using watercolors. It's a beginner's level tutorial that’s intended for new artists and painters. Using watercolors will let you play with various blends and shades. You can also try to show a bit of creativity, and see what you can make of this simple painting.
Things You'll Need:
A Sweet Bouquet of Hollyhocks

This sweet and simple painting of a bouquet of hollyhocks is perfect for new artists who’re interested to work with watercolors. You don’t need to have any prior experience in painting to work on this. The tutorial is enough to get you through this painting. If anything, you should try and experiment with this painting, and explore your creative side.
Things You'll Need:
Painting Hollyhocks with Cotton Swabs

This painting process uses the simple cotton swab technique. Take a bunch of cotton swabs, dip them in acrylics, and press on the canvas afterwards. It’s as simple as that. This particular painting has a very rough look, a bit too rough for my taste. I’d recommend you try to give it a smoother look. Apart from that, the rest of the painting is pretty fine as a beginner’s level artwork.
Things You'll Need:
Realistic Hollyhock Painting in Watercolor

This realistic hollyhock painting is brilliantly done. It’s astonishing how the artist managed to make the painting look so vibrant by using just watercolors. It’s a simple technique, and an easy application. The painting won’t take long to work on, but make sure you’ve watched the video a few times before starting out. Otherwise, you might lose your way while working on it. Surely, you wouldn’t want that.
Things You'll Need:
Lovely Watercolor Painting of a Bunch of Hollyhocks

For our next video lesson, we look at a lovely bunch of hollyhocks painted with watercolors. It’s a simple painting, and an equally simple tutorial. The whole process will hardly take you 20 minutes to finish. You don’t have to worry much about the shading and details. Just focus on the coloring, and avoid getting the paper dirty. That way, you’ll be left with a neat painting, and no rough patches, and no one will even bother notice that the details aren’t there.
Things You'll Need:
Lifelike Hollyhock Painting
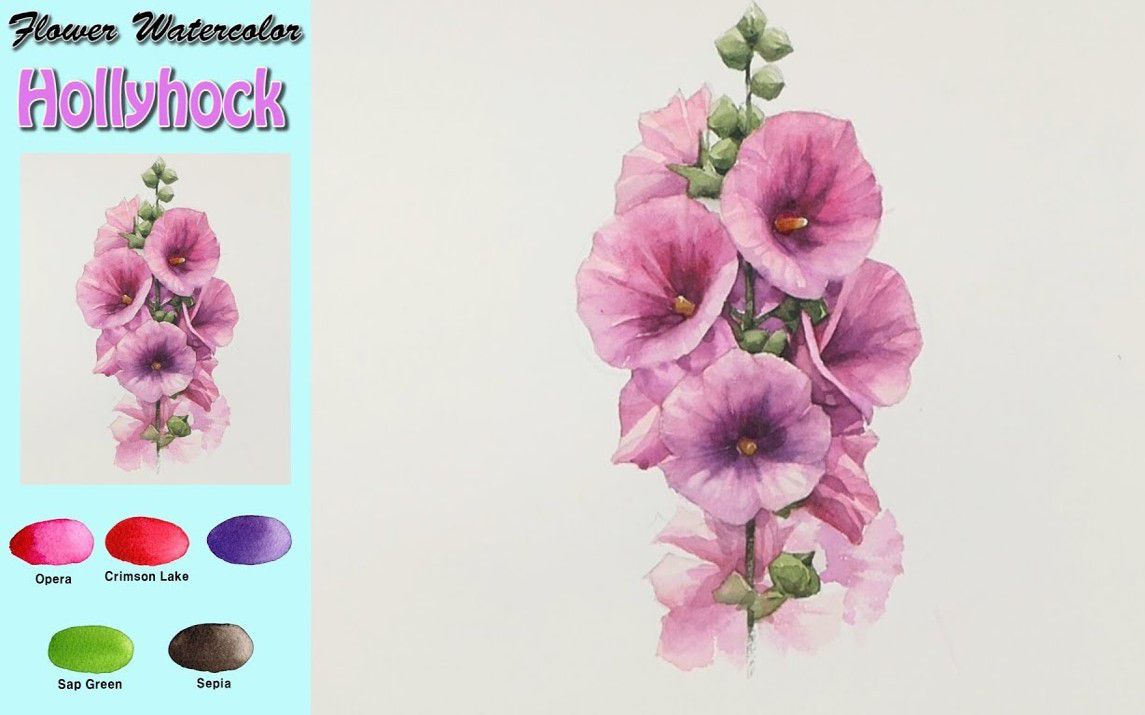
This lifelike painting of hollyhocks uses the wet on wet technique. This watercolor painting technique is nothing difficult. In fact, it’s a very simple application that can give you some amazing results. I really enjoyed painting this. It was a great experience, as well as an amazing learning opportunity for me. I recommend you try this irrespective of your skill level. You might not get the expected results, but you’ll surely get to learn a lot.
Things You'll Need:

By Jimena & Iñigo
The Navarro-Rubios
My husband and I are learning how to draw and paint. We wanted to share this learning process with the world and have fun! That's why we created this blog. We'll have drawing contests every week and you'll decide who won that week! Follow along and learn with us!

Jimena & Iñigo
The Navarro-Rubios
My husband and I are learning how to draw and paint. We wanted to share this learning process with the world and have fun! That's why we created this blog. We'll have drawing contests every week and you'll decide who won that week! Follow along and learn with us!
