Introduction
Drawing water droplets may seem an enormously difficult task; but, this is not true. There are some simple concepts of light you must understand to draw perfect, and beautiful 3-D water drops. In this article, we share ten different tutorials that teach you how to draw water drops from the scratch. These tutorials will be ranked on a scale of 3 to 5 and categorized based on their difficulty – beginner, intermediate, and advanced.
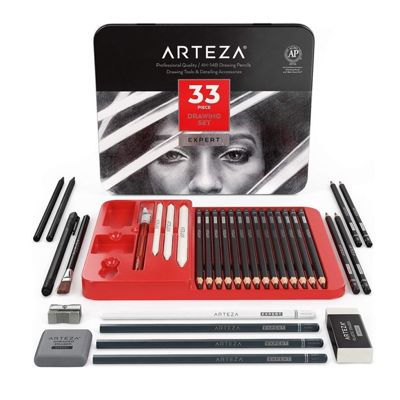
Water drops can be drawn using some simple daily use tools. Generally, we will require an HB pencil, a black charcoal pencil, a white or greyish paper, a white charcoal pencil, an eraser, and a blending pencil. A water drop acts as a transparent surface and light waves enter the droplets from the side of the light source. Then they are refracted evenly throughout the droplet. The area opposite of the light source is lighter, and around the source is darker.
How to draw spectacular looking water droplets

To start, this article explains in detail the scientific reasons behind the shading of the droplet when we view it in our daily life. Mat Fussell then describes (in seven simple steps) how to effectively draw the droplets from scratch. He uses HB and 4B are used to create darker values, while a white charcoal pencil is used to create lighter tones. White and black blending stumps are also used for shading in this tutorial.
Things You'll Need:
Guide to draw sharp water droplets

This is a basic guide, without any scientific details, on how to draw droplets by keeping the background shaded in dark greyish colors. The method is similar to the one discussed above. However, this time a black charcoal pencil is used instead of the 4B pencil. The background is shaded intentionally to create a more realistic drawing. A black charcoal pencil is used to add a dark outline, while the white one is used to create highlights to the drops of water.
Things You'll Need:
A quick guide to creating wonderful drops of water

Now, this is one of the quick tutorials to create water drops if you are a complete newbie. The good thing about this guide is that it outlines steps in an easy to understand manner and give reasons as to why some effects take place. For instance, why the top of the droplet is darker compared to the bottom. Also, towards the end, there is a tip to use a colored (grey recommended) background to create a greater degree of contrast to the drawing. There are no specific pencils defined in this tutorial though.
Things You'll Need:
A meticulous guide to draw water drops accurately

As the heading suggests, this is a meticulous (and, short) video tutorial explaining how to draw a water droplet with utmost precision. The droplet a clearly defined light source, shadow, outline, and area with brightness. Emmy Kalia describes the materials she used clearly in each step as well. She used 3B and 5B pencils to create dark outlines, and needle eraser as well the create contrast (other tools were the same as previous tutorials). Also, she used an acrylic marker to highlight the light source.
Things You'll Need:
How to draw an impeccable water drop

The result of this tutorial is quite amazing. The presenter, weirdly, speaks very less in this tutorial. However, how he draws a stationary water drop is commendable. He starts off using a black charcoal pencil to create the outlines and darker outline opposite the light source. The unique aspect of this tutorial is that to blend, the artist uses an inexpensive alternative; the cotton-bud (ear-bud). To create the shadow he uses a charcoal drawing, and to intensify the lighting source he uses a gel marker (although, he fails to define it himself in the video).
Things You'll Need:
Drawing perfectly circular water drops quickly

This tutorial is extremely quick. At 3 minutes long, the presenter tries to teach the art of drawing water drops (three drops of different sizes) swiftly. He uses a charcoal pencil, a black blending pencil, and a 3HB pencil to creates dark outlines near the light sources. The droplets are perfectly circular and sketches are made using coins, and other circular daily use things such as caps. The result is majestic, as the drawing looks brilliant in 3D
Things You'll Need:
Simple water drop drawing using a pencil only

As the title suggests, this tutorial is a unique way to draw a water droplet because the presenter uses only the pencil and various shading effects to artistically draw a drop of water. All in all, he manages to do pretty well just by using various shades of black and white to create an image of a water drop, but it is not as impressive as it could have been if he used more tools (like different pencils, markers or blending pen). But, still, it is an effort that must be praised.
Things You'll Need:
How to draw a tiny water drop

Talking about sizes, this video provides a way to draw a tiny waterdrop using an HB pencil, and a blender. Blender is used specifically for shading purposes, while a pencil is used to creates dark outlines and create contrast. The result is not spectacular as it could have been, but the size of the drop (too short) didn’t allow that to happen. The video is still a good guide for an amateur
Things You'll Need:
A magnificent cylindrical water droplet

Water droplet falling off a leaf are usually cylindrical. This tutorial is a brief, but extremely well explained guide on how to draw a cylindrical water droplet on a gray-toned paper. It also describes the direction of the light source and the contrast between light and dark areas in majestic. The presenter draws the droplet with each step defined in clear words. For anybody willing to master the art of drawing water drops, this is a superb video.
Things You'll Need:
A scintillating drawing of a heart-shaped water drop

There may not be words to describe how creatively Naushad Ahmed managed to draw a heart shape water drop in less than 4 minutes. This tutorial is what we can call artistic brilliance. He uses traditional ways to draw a heart shape droplet with light entering from the left. However, the distinctive feature of his drawing was how he was able to contrast between white and black shades and the delicacy with which he was able to define the shadow.
Things You'll Need:

By Jimena & Iñigo
The Navarro-Rubios
My husband and I are learning how to draw and paint. We wanted to share this learning process with the world and have fun! That's why we created this blog. We'll have drawing contests every week and you'll decide who won that week! Follow along and learn with us!

Jimena & Iñigo
The Navarro-Rubios
My husband and I are learning how to draw and paint. We wanted to share this learning process with the world and have fun! That's why we created this blog. We'll have drawing contests every week and you'll decide who won that week! Follow along and learn with us!


